You sit down with a blank piece of paper and suddenly your pencil feels like it weighs ten pounds. Your brain just goes blank. Nothing comes out. Then you start looking at all those amazing drawings people post online and you think how the hell do they even start without ruining everything on the first try.
I know that exact feeling because I lived it for years. I would not even pick up a pencil because I told myself art is for people with some special talent and I clearly did not get that gift. Then one day I just gave up on making anything perfect and decided to make something simple instead. That little shift changed everything for me.
The truth about making art is much simpler than most people think. You do not need expensive supplies. You do not need years of training. You just need a few easy art ideas for beginners that take away all that pressure and let you enjoy the process of creating something with your own hands.
This article shares easy art ideas step by step so you never feel lost or confused about what to do next. Every idea here works perfectly as easy art ideas for beginners at home because you already own most of the supplies you need. No fancy studios. No special equipment. Just you, some basic tools, and the simple joy of making marks on paper.
What You Actually Need to Get Started
Before jumping into the projects, let me tell you about supplies. Many beginners rush out to buy expensive art materials thinking better tools will make better art. That is simply not true. Some of my favorite drawings came from a cheap ballpoint pen and scrap paper.
Here is everything you truly need to try these easy art ideas for beginners:
- Any kind of paper works fine (printer paper, notebook paper, even the back of junk mail)
- A regular pencil with an eraser on the end
- A black pen or marker for outlines
- Crayons, colored pencils, or any coloring tool you already have
- Your own two hands
That is it. Really. You can create beautiful things with just these items. Now let me walk you through some projects that will surprise you with how good they turn out.
You may also read :- Decorative Mini Do It Yourself Easter Egg Basket
Easy Art Ideas Step by Step: Abstract Shape Drawing
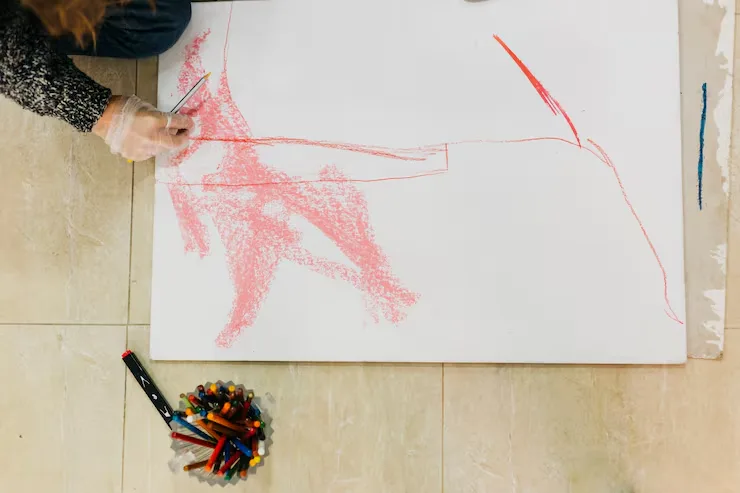
This first idea works perfectly for people who feel scared of drawing because you cannot possibly get it wrong. Abstract shape drawing asks nothing from you except the willingness to move your hand across the paper.
What Makes This So Good for Beginners
Abstract drawing takes all that pressure off your shoulders. You know that feeling when you try to draw a face and it comes out looking like a potato? Yeah, none of that here. You do not need to make anything look like anything real. No perfect faces, no dogs that actually look like dogs, none of that stress. You just put down shapes until your eyes feel happy looking at them.
Start with your pencil. Just draw maybe five or seven big shapes and let them bump into each other and pile on top of each other. Circles are fine. Squares work. Triangles. Or make wobbly blobs that look like someone spilled water on the page. Make some shapes huge and some tiny. Let them touch. Let them cross over. Do not worry about anything else.
Step two asks you to grab your black pen. Trace along every line you just drew with your pencil. Press firmly so the ink stands out clearly against the paper.
Step three brings out your colored pencils or crayons. Fill each shape with a different color. You can stay inside the lines or scribble right over them. The choice belongs completely to you.
Step four adds the final touch. Look at where shapes overlap each other. Color those overlapping sections with a darker version of the color you used or try a completely new color that creates contrast.
What you end up with looks like a modern art piece that could hang in a real gallery. The best part is that you created it without any stress about getting things right.
Easy Art Ideas for Beginners at Home: The One Line Drawing
Here is one of my favorite easy art ideas for beginners at home because it teaches you something important about making art. One line drawings force you to keep moving forward without stopping to fix mistakes.
How to Create a One Line Drawing
Pick something simple to draw. A house works great for the first try. A flower also works well. A coffee cup makes another good choice. Place your pen on the paper and do not lift it up again until you finish the entire drawing.
You do not have to keep your line straight. Let it wiggle around. Let it curve however it wants. Say you are drawing a house and you finish one side. Your line can just wander across the page to get to the other side. It loops around and comes back however it finds a way. When you finally stop, your drawing looks loose and full of life. It does not look like a robot drew it. It looks like you had fun making it.
The magic of this exercise comes from letting go of control. Your hand makes mistakes but keeps moving anyway. Those mistakes turn into personality and character that make your drawing uniquely yours.
Try this exercise three times with the same object. Your first attempt looks shaky. Your second attempt looks more confident. Your third attempt starts to look genuinely interesting. Save all three drawings so you can see your own progress.
Art Ideas Step by Step: Pattern Building
Patterns feel like a secret weapon for beginners because patterns follow simple rules that anyone can learn. You do not need to draw anything specific. You just need to repeat a small shape over and over again.
Building Your First Pattern
Begin by drawing a single small shape in the center of your paper. A little star works nicely. A tiny heart also works. Even a small triangle or a little dot with a circle around it does the job perfectly.
Next add the same shape above the first one. Leave a small gap between them. Add another shape below the first one. Add shapes to the left and right sides as well.
Continue filling your paper with this same shape. Keep the spaces between shapes roughly equal but do not worry about measuring anything. Your eye can judge the distance well enough.
Then switch to a second shape. Put this new shape in all the empty spaces between your first shapes. The two shapes start talking to each other across the page. Your eyes enjoy following the conversation between them.
Finally add color if you want. Color every first shape one color and every second shape a different color. The pattern jumps off the page with energy and life.
This project works wonderfully as easy art ideas step by step because you can pause after any step and come back later without losing your place. The process feels meditative and calming in a way that drawing realistic pictures never does.
A Quick Look at These Projects
Here is a simple table showing what each project offers you as a beginner:
| Art Project | Time Needed | Materials | Difficulty Level |
|---|---|---|---|
| Abstract Shape Drawing | 20 to 30 minutes | Paper, pencil, pen, colors | Very Easy |
| One Line Drawing | 5 to 10 minutes | Paper, pen | Extremely Easy |
| Pattern Building | 15 to 60 minutes | Paper, pencil, colors | Very Easy |
| Hand Tracing Doodle | 10 to 15 minutes | Paper, pencil, pen | Extremely Easy |
Easy Art Ideas for Beginners at Home: Hand Tracing Doodle
Turning Your Hand Into Art
Now here comes the creative part. Turn that hand outline into something completely different. The space between your thumb and first finger might become the mouth of a fish. Your fingers might become the legs of an octopus. Your palm might become the body of a bird with fingers turning into feathers.
You can also keep the hand shape as a hand but fill the inside with patterns. Draw tiny circles inside each finger. Fill the palm with stripes. Add zigzag lines across the back of the hand. The contrast between the simple outside shape and the detailed inside patterns looks striking and professional.
This idea ranks among the best easy art ideas for beginners at home because children and adults can do it together. Everyone traces their own hand and everyone creates something different from the same starting point.
Easy Art Ideas: The Landscape That Anyone Can Draw
Landscapes scare many beginners because they think about all those tiny details in nature. The trick to drawing landscapes lies in simplifying everything down to basic shapes.
Drawing Hills and Sky and Trees
Start by drawing a straight line across your paper about one third of the way down from the top. This line becomes the horizon where the sky meets the ground.
Above the horizon line, fill the space with soft curved lines that look like clouds. Do not draw hard outlines around these clouds. Let them sit softly against the sky. Add a circle for the sun somewhere in the upper part of your page.
Below the horizon line, draw rolling hills using big curved lines. These lines should go from one side of your paper to the other side. Layer two or three rows of hills so the background hills sit higher on the page and the foreground hills sit lower.
Add trees by drawing simple triangles for pine trees or fluffy circles on top of sticks for leafy trees. Group your trees in clusters of three or five because odd numbers look more natural than even numbers.
Finish with small details like a little house made from a square and a triangle. Add a winding path that starts big at the bottom of your page and gets smaller as it moves toward the horizon. This path creates depth and draws the viewer into your drawing.
Color the sky light blue and the sun bright yellow. Color the hills in different shades of green with the lightest green in the background and the darkest green in the foreground. This simple trick makes your landscape look deep and real.
What to Do When You Feel Stuck
Every beginner hits moments when nothing looks right and everything feels wrong. Let me tell you what works when this happens to you.
Put your paper away for an hour or even a full day. Come back with fresh eyes and you will often see that your drawing looks much better than you remembered. The problems that seemed huge suddenly look small and fixable.
Try working smaller. A tiny drawing on a small piece of paper feels less intimidating than a big drawing on a large sheet. Cut your paper into four small pieces and make four tiny drawings instead of one big one.
Switch the hand you draw with for five minutes. Drawing with your non-dominant hand removes all expectations because you know it will look messy. The messiness often creates interesting marks that you would never make with your good hand.
Copy something you love. Find a simple drawing online or in a book and try to recreate it exactly. Copying other artists teaches you techniques that you can use in your own work. Just do not try to sell copies or claim someone else's work as your own.
Bringing Art Into Your Daily Life
Making art does not require big blocks of time or special occasions. Ten minutes after dinner works perfectly. Fifteen minutes before bed works just as well. The key is showing up regularly rather than waiting for inspiration to strike.
Keep paper and a pencil in the places where you spend time. Put them next to your favorite chair. Keep them on your kitchen table. Tuck them into your bag so you always have supplies when a spare moment appears.
Stop comparing your work to what you see online. The artists posting those beautiful drawings practiced for years before sharing their work. You only see their finished pieces, not the hundreds of failed attempts that came before.
Celebrate every drawing you finish regardless of how it looks. The act of finishing something matters more than the final product. Each completed drawing builds your confidence and your skill at the same time.
Frequently Asked Questions About Easy Art Ideas for Beginners
Q: What if I cannot draw a straight line without a ruler?
A straight line does not matter nearly as much as you think. Some of the most beloved artists in history drew wobbly lines on purpose because wobbles feel more alive and human than perfect straight lines. Your slightly shaky hand creates character that no ruler can copy. Embrace your wobbly lines and call them part of your personal style.
Q: How long should I practice before my drawings look good?
Most beginners see noticeable improvement after just two weeks of drawing for fifteen minutes every day. The changes happen slowly at first and then suddenly everything clicks into place. Keep your old drawings so you can look back after one month and see how far you traveled. The gap between what you want to make and what you actually make closes faster than you expect.
Q: Can these easy art ideas for beginners work for children too?
Every idea in this article works wonderfully for children ages five and up. Young children love the abstract shape drawing because no adult can tell them their shapes look wrong. Older children enjoy the pattern building because patterns feel like solving a puzzle. Drawing together as a family creates a wonderful shared activity that does not involve screens or complicated rules.
Q: What are the best easy art ideas for beginners at home when I have no art supplies?
You can make beautiful art using nothing but a stick and some dirt in a parking lot. You can arrange leaves and flowers on the ground into temporary pictures that last only until the wind blows. You can use your finger to draw on a foggy window. You can fold paper into shapes without drawing anything at all. Art exists in the act of creating, not in the materials you use.
Q: How do I make easy art ideas step by step look less childish and more grown up?
Pay attention to the spaces between your shapes as much as the shapes themselves. Grown up looking art often comes from leaving interesting empty spaces rather than filling everything up. Also try using only two colors instead of many colors. Limiting your choices often creates more sophisticated results than using every color you own.
Your First Step Forward
Pick one idea from this article and try it today. Not tomorrow. Not next week when you have more time. Today. Right now if possible. Grab any piece of paper and any writing tool within reach. Draw something simple and quick. Do not judge it while you draw. Do not compare it to anything else. Just make the marks and see what happens.
The hardest part of making art happens before you ever touch the paper. The hardest part is believing that you can do it. You can do it. You already proved that by reading this far and caring enough to learn.
Your first drawing might not look like much. Your tenth drawing will look better. Your hundredth drawing will shock you with how good it became while you were not paying attention.